-

-
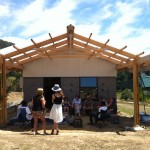
Welcome to 60k House
-
-
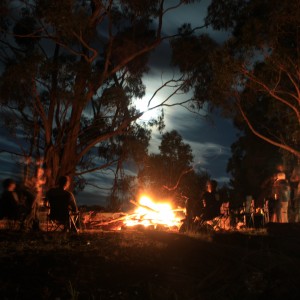
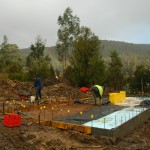
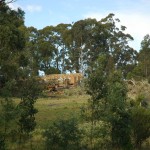
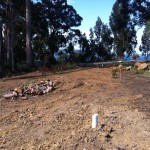
The first party on the site – 2009. [Photo credit: Kate Lilley]
-

-
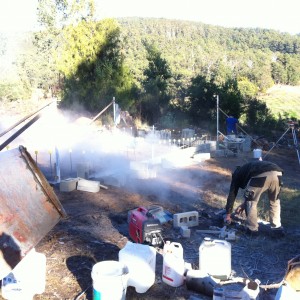
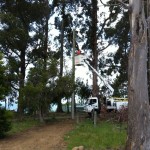
Light filters through smoke on the site
-

-
Looking east – D’Entrecasteaux Channel and Bruny Island
-
-
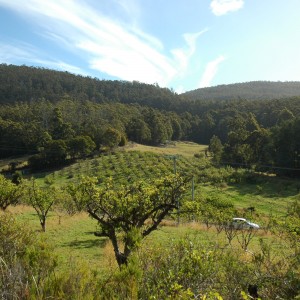
Looking west – heritage apple orchard and valley
-
-
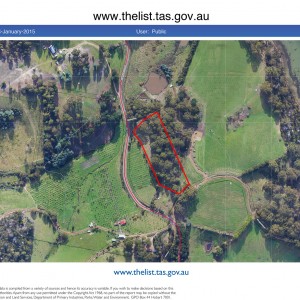
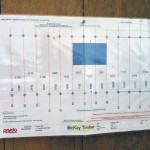
Map Report
-
-
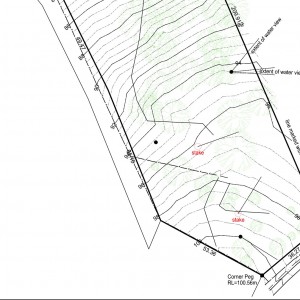
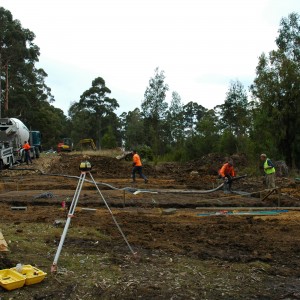
Contour and detail survey
-
-
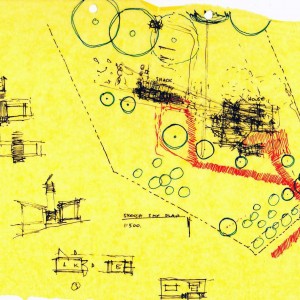
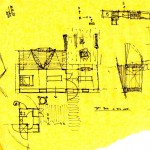
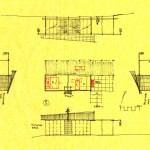
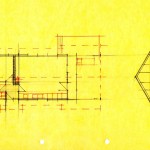
Site Plan sketch – the first design sketch
-
-
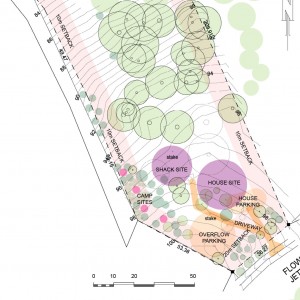
Site Plan diagram
-
-
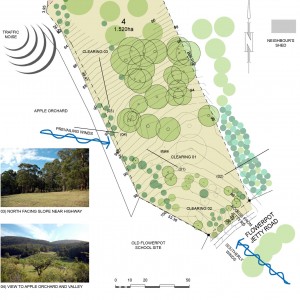
Site analysis diagram
-
-

-
-
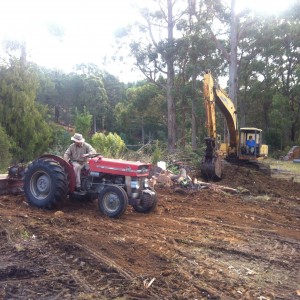
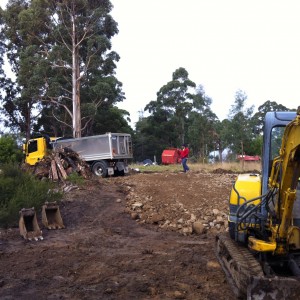
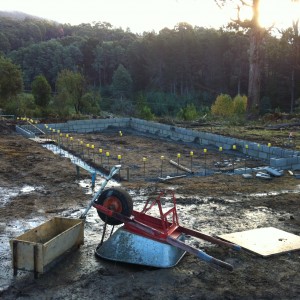
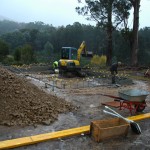
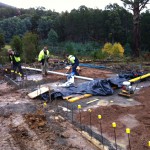
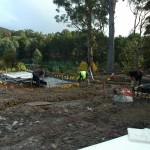
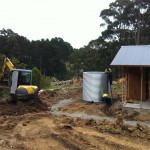
Preparing the building site
-
-
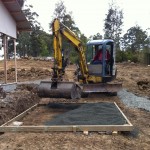
Leveling the building site
-
-
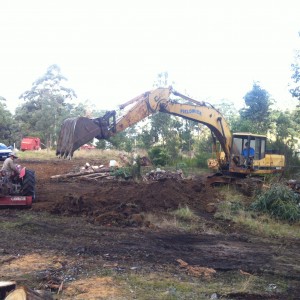
Removing the topsoil to form the driveway
-
-
The excavator track rolling the gravel on the driveway
-
-
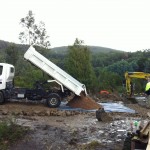
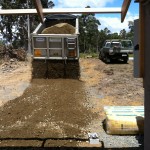
A truck delivering a load of gravel
-
-
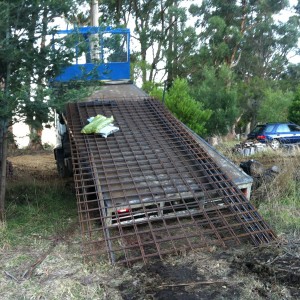
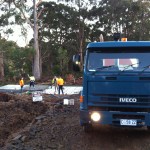
The first delivery truck – structural steel for the footings and slab
-

-
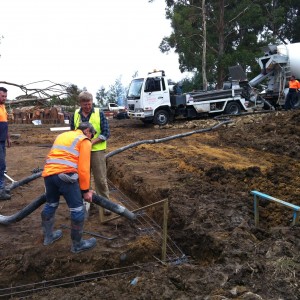
The first concrete truck. They look heavy – they are
-

-
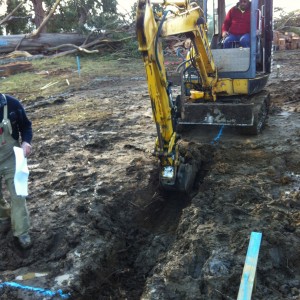
Working within the lines – Alan digging the footings under the watchful eye of Greg
-
-
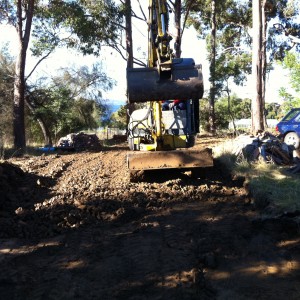
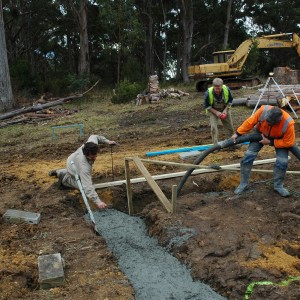
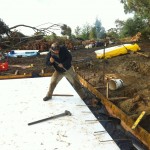
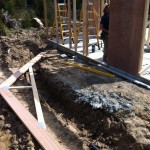
Digging the strip footing
-
-
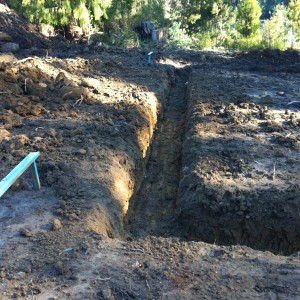
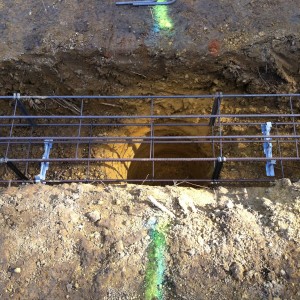
The strip footings dug with trestle on the left for the string line
-
-
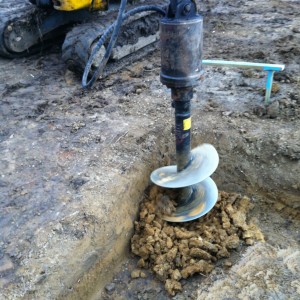
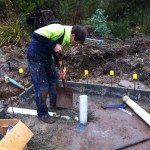
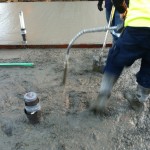
Using the auger to bore the piers beneath the strip footing
-
-
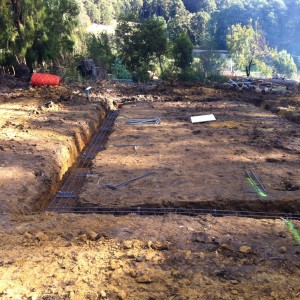
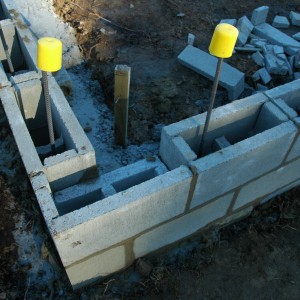
The footings all dug with the trench mesh (steel reinforcing) in place
-
-
The bored pier beneath the strip footing. The line of spray paint is to show where the pier is once the footing is filled with concrete
-
-
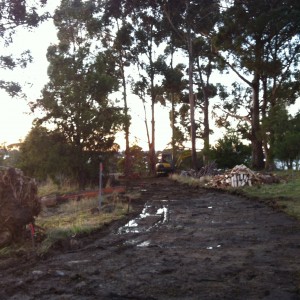
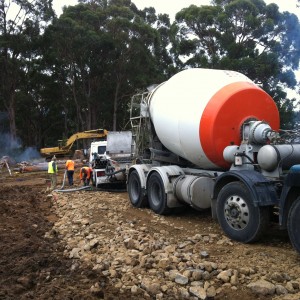
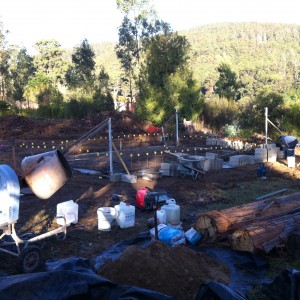
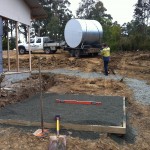
The pump truck and concrete truck on the freshly made driveway
-
-
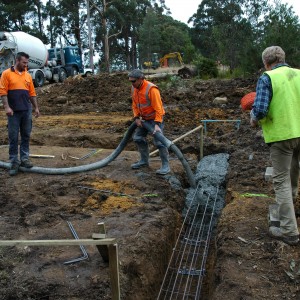
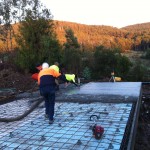
The first concrete is pumped into the footing
-
-
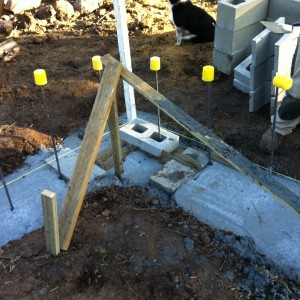
The stressful moment when the concrete pump gets blocked. The thing on the tripod is called a ‘dumpy’ and is used for getting levels on site
-
-
Pumping the concrete into the footings
-
-
My neighbour Josh pushing the steel reinforcing into the bored pier so it is tied to the strip footing
-
-
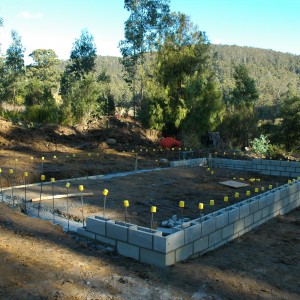
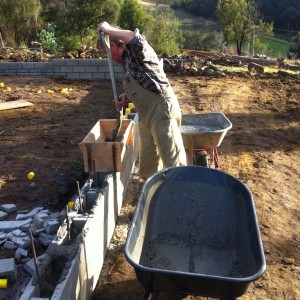
The blockwork finished
-
-
Setting up
-
-
Equipment and materials for mixing the mortar: sand, water, cement, mixer, generator (power)
-
-
The first block!
-
-
Cutting blocks
-

-
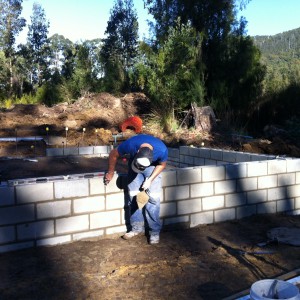
Scott laying the top course of blocks
-
-
Trent ‘pointing’ the blocks (finishing off the joints)
-
-
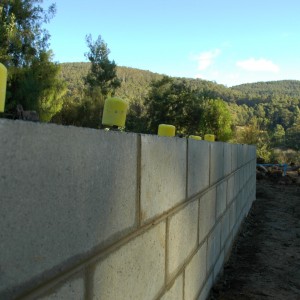
A beautiful straight, level blockwork wall
-
-
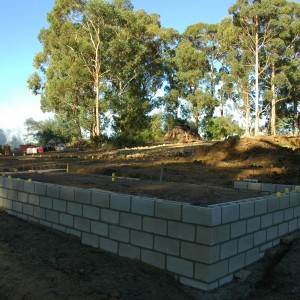
The finished blockwork
-
-
The invoice…
-
-
Wash up after the blockwork has been filled with concrete
-
-
Greg filling the blocks with concrete
-
-
The top course of ‘knock out’ blocks, with the corner block already knocked off
-
-
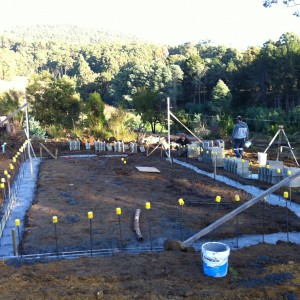
Preparing to fill: bailing out the water, removing the topsoil and knocking out the knock-out blocks
-
-
Luke on the ‘whacker-packer’, compacting the gravel fill
-
-
The ‘whacker packer’ sits silent as the sand waits to be spread across the FCR
-
-
Forming the concrete strip thickening in the middle of the slab
-
-
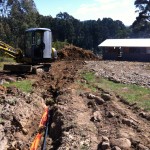
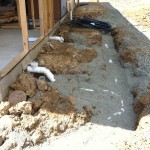
Digging the trench for the plumbing
-
-
-
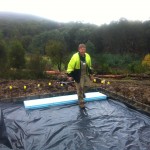
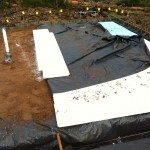
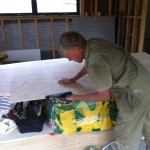
Is that a smile? First piece of floor insulation in place
-
-
Delivery of sand – the top layer of fill
-

-
Pete moving the sub-slab insulation into place
-
-
Hint of a rainbow: working through the bad weather
-
-
The polystyrene sub-slab insulation can be cut with a handsaw
-
-
Steve and Greg laying the plastic sheet for the concrete to be poured over; Pete using the wheelbarrows as a makeshift sawhorse
-

-
If you want a rainbow you have to put up with the rain: working through the bad weather
-
-
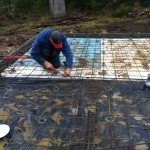
Iron Man! Pete bending the steel reinforcing from the footings back so it can be tied into the slab
-
-
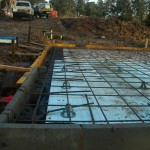
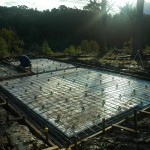
The steel reinforcing in place and straight edge formed for the concrete slab to be poured
-
-
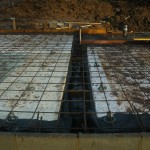
The edge thickening in the slab, lined with plastic
-
-
Steve tying the sheets of reinforcing together; the set down in the slab for the wet area
-
-
Finishing off before the sun goes down
-

-
Early start: stuck behind the first concrete truck while driving to site before sunrise
-
-
More trucks: pumping the concrete to the slab via a pump truck
-
-
Early morning sun: the concrete pour part way through
-
-
Messy work: gumboots are a must
-

-
The morning of pouring the slab: one concrete truck waits for the other to leave
-
-
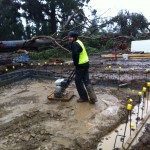
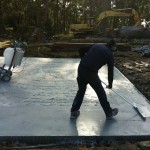
Pumping, leveling and vibrating the concrete
-
-
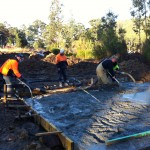
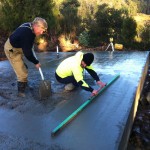
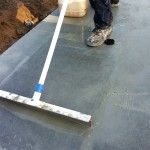
Teamwork: Stuart screeds the concrete while Greg removes the excess
-

-
Hands and knees: Stuart working by hand to make the fall to the floor waste (shower) in the wet area
-
-
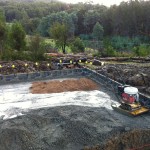
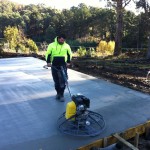
Flying solo: Stuart pilots the ‘helicopter’ – a mechanical tool for finishing concrete slabs
-
-
Mind the step: the setdown in the slab for the wet area
-
-
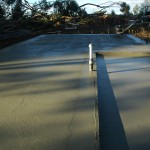
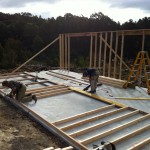
A thing of beauty: the slab, poured and nearly finished
-

-
The view of Wineglass Bay from the top of Mt Amos
-
-
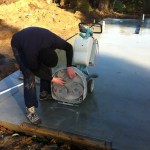
Dean fixing the discs to the grinder
-
-
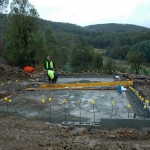
Slow going: working around the slab
-
-
The hire generator (power supply) for the concrete grinder
-
-
Easy access: grinding the edge of the slab
-

-
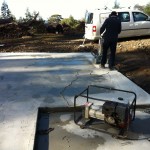
Collecting water from the dam for the concrete grinder
-
-
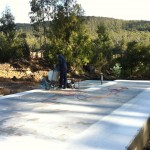
Scrape it off: removing the paste made from the water and concrete dust
-
-
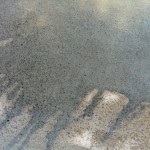
Getting there: revealing the concrete finish beneath the sludge
-
-
Looks more impressive when wet
-
-
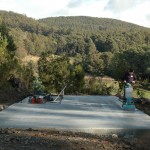
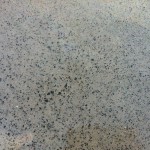
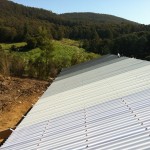
The (nearly) finished product: the salt and pepper look
-
-
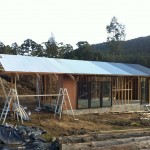
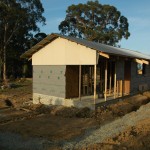
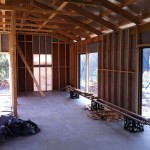
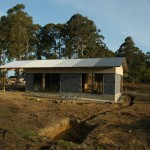
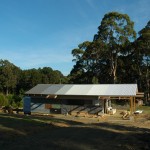
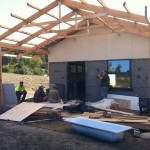
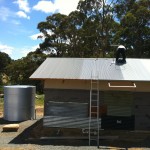
60k House under construction
-
-
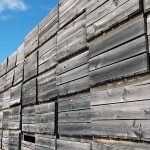
Design inspiration: stacked apple crates at nearby Trial Bay Orchards
-
-
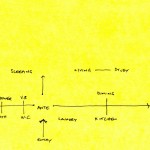
Function and relationship diagram of 60k House
-

-
Simple diagram – complex balancing act
-
-
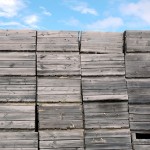
Apple crates: design inspiration for the cladding to reference the local fruit industry
-

-
Colour inspiration from the bark of trees on site
-
-
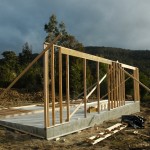
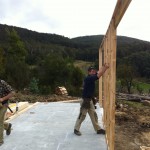
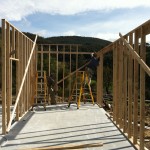
Going up: the first wall frame up in place
-
-
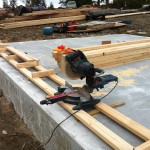
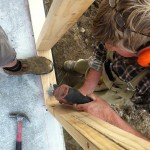
Drop-saw setup ready to cut the studs to length
-
-
Kapow! Greg using the nail gun to assemble the wall
-

-
There was still no power connection so we used two generators for all of the power tools and air compressor to power the nail gun
-
-
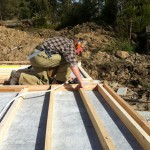
Down the bottom: damp course and metal strapping
-
-
Smiles all round! The first wall is lifted into place
-
-
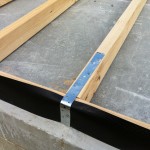
Drilling a hole through the bottom plate for a Dynabolt to be driven into and tightened, locking the wall to the slab
-
-
The first wall up, standing on its own (with the help of some temporary bracing)
-
-
The second wall nearly ready to lift into place
-
-
Squaring off the end wall with temporary bracing
-
-
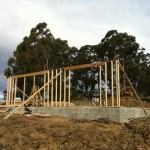
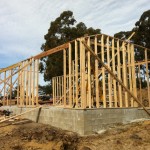
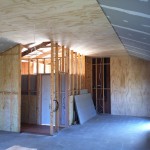
Taking shape: with more walls up it’s beginning to look like a building
-
-
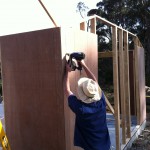
Nailed it: Pete nailing the brace ply to the corners of the wall
-
-
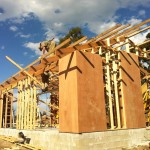
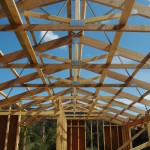
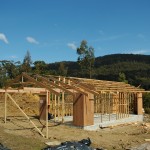
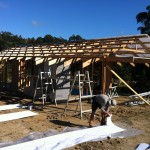
Really taking shape! The first truss in place – helps make the overall shape look less like a Quaker barn
-
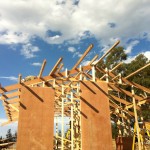
-
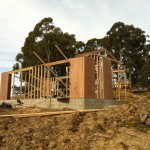
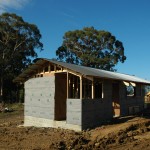
Walls up, brace ply on, trusses up and purlins on
-
-
A well earned thirst: after three solid days the walls were up and the roof trusses were on
-
-
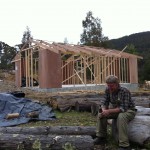
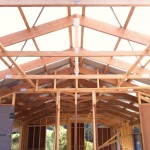
Taking shape: the roof trusses and framing in place
-
-
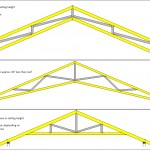
Various truss options for a higher ceiling: 60k House has type 3
-
-
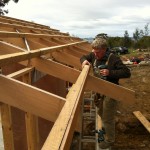
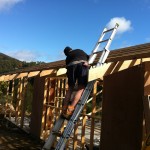
Waiting for a lift: truss ready to be lifted into place
-
-
The roof truss and bracing plan, nailed to a wall for easy reference
-
-
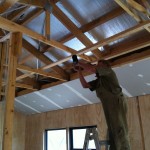
Attaching the purlins
-
-
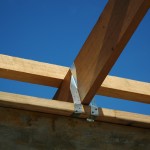
The trusses are tied down to the top plate of the wall with metal strap bracing
-
-
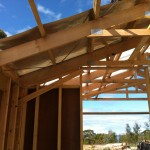
Roof trusses and bracing in place
-
-
The ends of the trusses will be taper cut to reduce exposure of the end grain to the weather
-
-
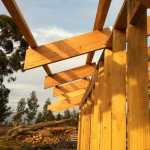
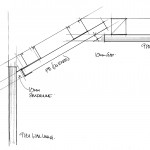
Working things out: drawing a 1:1 detail of the fascia
-
-
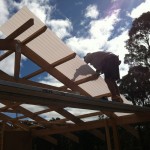
Greg fixing the fascia to the purlin
-
-
Trusses up and most purlins in place
-
-
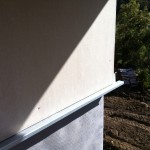
Installing the gutter brackets
-
-
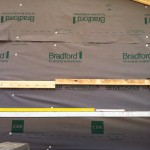
Sisalation installed under the roof sheeting
-
-
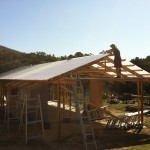
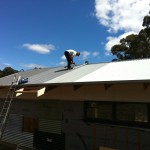
First sheet of roofing up!
-
-
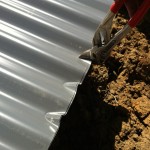
Ian trimming the sheets of polycarb before installation
-
-
Selected for performance: the ‘Opal’ colour polycarb provides diffuse light while reducing heat transmission and cuts out UV
-
-
The ends of the purlins are taper cut to reduce exposure to the weather. The end grain is also oiled to minimise weathering and water penetration
-
-
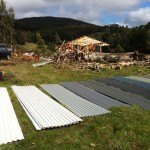
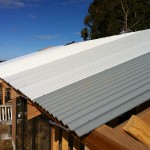
Out in the open: the range of colours supplied, laid out on the grass
-
-
Fade to white: the gradation of the multi-coloured roof
-
-
End of roofing day 1: half of the roof in place
-
-
This is known as ‘weathering’ and prevents water being blown up the valley beneath the ridge capping
-
-
Finishing off: forming the end of the ridge capping
-

-
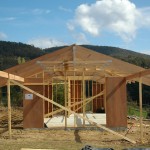
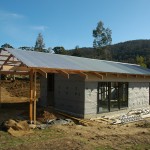
Sense of enclosure: the roof on
-
-
Looking over the roof to the apple orchard and valley beyond
-
-
Just build a big roof: an early design sketch showing semi-permanent camping with hammocks, fire pit and outside toilet
-
-
-
-

-

-
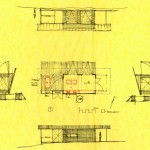
Break-through: after deciding to apply for the FHBB this layout incorporates all of the functions under the one roof
-
-
Fresh eyes: more ideas and suggestions from a colleague
-

-
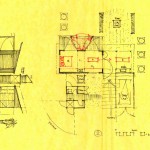
Looking at a squarer footprint, internal thermal mass walls and the possibility of an upper level loft
-
-
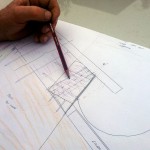
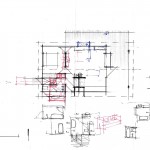
Drawing over the approved Development Application design
-
-
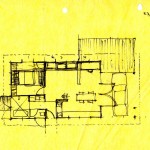
Getting close: nearly the final design
-
-
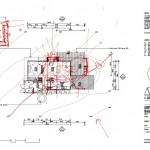
Close: this is very close to what is being built
-

-
Figuring it out as we go: examining where the cement sheet cladding should sit in relation to the window frame
-

-
Easier than doing it by hand: the excavator covering in the power cable
-
-
Cover up: filling in the trench
-

-
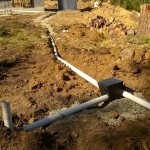
Unwinding the poly water pipe to lay in the trench with the warning tape
-
-
All done: no pole, no overhead wires – underground power connection in place
-
-
Within reach: the ‘upside-down’ meter box with the panels mounted at the bottom
-
-
Cherry picker of a different variety: connecting the power cables at the top of the new pole on the corner of my block
-
-
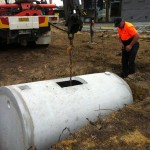
Adding the fittings to the water tank
-
-
Easy does it: filling up the tank base
-

-
Ag drain covered in geo-tech cloth to prevent it being
-
-
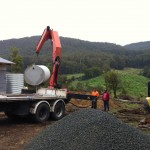
Good timing: the tank arrived just as we finished leveling the tank base
-
-
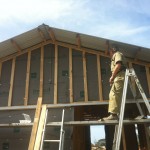
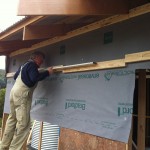
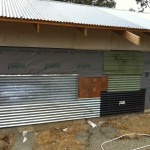
All wrapped up: the building covered in wall wrap and some of the high cladding
-

-
Light and airy: plenty of ventilation beneath the gable (before it gets covered up)
-
-
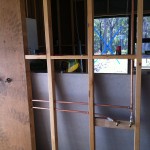
The large openings not wrapped
-
-
Overlap: ensure the wrap laps over other sheets, and always the top layer over the bottom layer so water can run off
-
-
Batten down the hatches: vertical timber battens to provide an air cavity and to fix the cement sheet to
-
-
On the level: evening out the timber battens prior to fixing the cement sheet cladding
-
-
Trimming the excess roofing sisalation
-
-
Working it out: resolving the detail of where the face of the cladding will sit
-
-
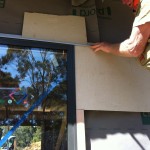
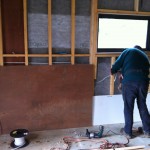
The first piece of cement sheet cladding being put up
-
-
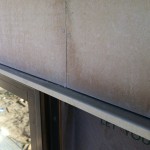
Neat detail: cement sheet cladding, flashing, window head
-
-
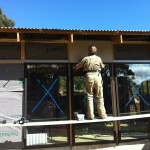
Light and shade: the corner of the building in the afternoon sun
-
-
Wind assisted: high winds ripped part of the wall wrap off the timber frame
-

-
Second wall cladding on: the remainder of the solid wall will be timber weatherboards
-
-
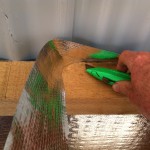
The cement sheet is easily cut with this hand tool
-
-
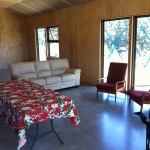
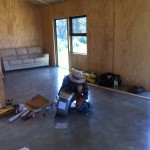
Enclosure: inside the building feels very different with the wall wrap up
-
-
Sitting pretty: covering in the septic tank
-
-
Thar she flows: all of the plumbing coming out of the rear of the house
-
-
Delivery service: the septic tank being moved off the truck
-
-
Gone: the absorption trenches, covered in topsoil, hardly noticeable except for the inspection opening pipe
-
-
Second time lucky: lowering the septic tank into the hole for the second time
-

-
On the level: the first absorption trench following the contours of the site
-
-
Even flow: the splitter box ensures even flow to each of the absorption trenches
-
-
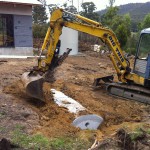
Location location: the hole for the septic tank
-
-
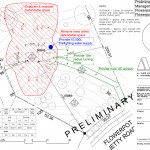
Preliminary Bushfire Hazard Management Plan for 60k House
-
-
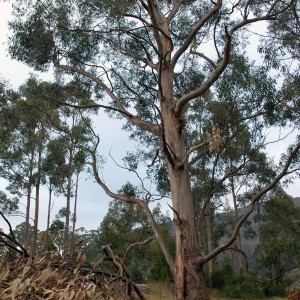
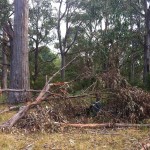
Cause for concern: a large branch fallen from a stringy bark onsite
-
-
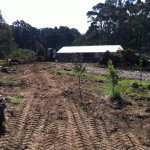
Clean: the area to the south of the house cleared
-

-
Colour coded: a summary of the different requirements for each of the BAL ratings. [source: State Government Tas – Department of Justice]
-
-
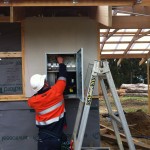
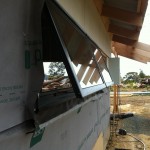
Open wide: all awning windows are fitted with metal mesh flyscreens to prevent embers entering the building
-
-
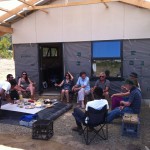
Shade seekers: outside under the roof on Christmas Day
-
-
Just in case: some more gravel for the driveway before the birthday party
-

-
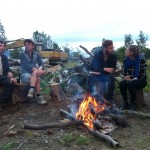
Primal: there’s something that draws people to fires
-
-
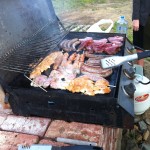
Meat: the cornerstone of an Aussie BBQ, seen here stacked on a pile of recycled bricks
-
-
Can’t have a gathering without a fire
-
-
Four of a kind: tradies quenching a well-earned thirst
-
-
Cool: setup for comfort on a scorcher summer day
-
-
Human nature: in the heat, outside under the roof
-
-
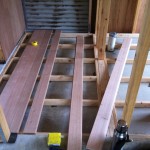
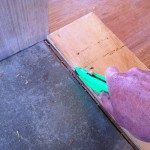
Welcome entry: Tas Oak timber floor boards supported on a timber frame
-
-
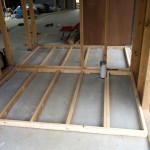
Setdown: the timber frame for the floor
-
-
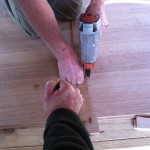
Nailed it: nailing the floor boards in place
-
-
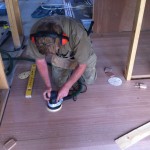
Smooth operator: sanding the floor boards for a smoother finish
-
-
Shiny and new: Greg applying the first coat of the wax
-
-
A thousand cuts: cutting the ends of the floor boards to make way for a a bead of silicone where the two materials meet
-
-
Assortment: second hand sheets of roofing used to enclose the building to protect the timber floor
-
-
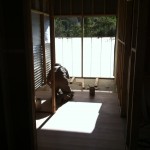
Room with a view: looking out above the temporary screen
-
-
Right to the edge: Dean grinding the floor
-
-
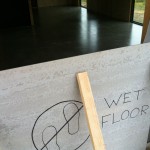
Sign of the times: home made sign indicates not to do the Tassie two-step dance on the wet floor
-
-
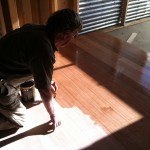
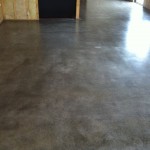
Done: the finished polished concrete floor
-
-
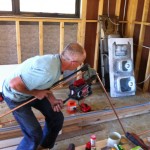
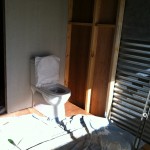
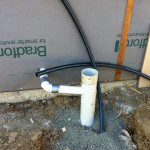
Pipes in the bathroom
-
-
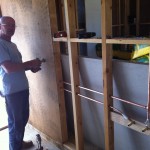
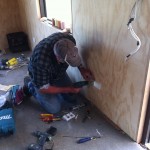
Run dem cables: Alan running the electrical cables through the wall
-

-
A whole lotta love: some of the cables for the lights and power points in the kitchen
-
-
Bend it like Beckham: Ian bending the copper pipe
-
-
Easy to reach: Ian working on the shower taps
-
-
Pride of place: the first item connected and installed in the house
-
-
Best spot for a signal: installing the TV aerial
-

-
Coming down: pulling the coaxial cable down from the aerial through the roof
-
-
Straight ahead: pointing the aerial between the trees
-
-
Playtime: Ian working on the laundry trough before installation
-
-
Power it up: Alan installing a power point inside
-

-
Quick and easy: temporary plumbing waste from the laundry trough
-
-
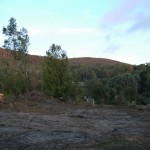
The calm before the storm: the site the morning that construction began
-
-
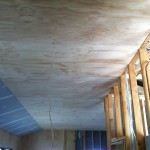
The plywood ceiling installed, with the electrical cables for the lights poking out
-
-
A drawing! Working out the detail of the material junction between the ply wall lining, the plasterboard ceiling and the ply ceiling
-
-
Pack it out: Greg nailing up timber battens to get the depth right for the shadow line between the different materials
-
-
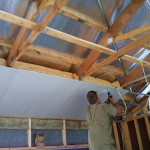
Greg fixing the furring channel for the plasterboard
-
-
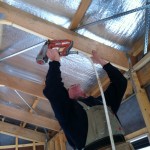
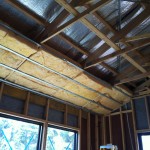
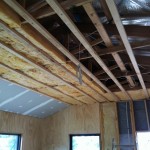
Packed to the rafters: the ceiling insulation held in place by the furring channel
-

-
Stick it: applying the adhesive to stick the plasterboard to the metal furring
-

-
Ready to go: insulation installed and adhesive in place – ready for a sheet of plaster
-
-
As well as the adhesive the sheets of plaster are also fixed with screws, which are then plastered over for a smooth finish
-
-
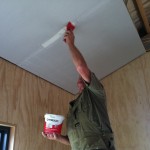
Demonstration: Greg plastering the first join – it was the only plastering he did…
-
-
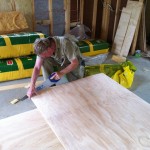
Straight cut: Greg cutting an edge of sheet with a hand saw
-
-
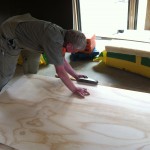
Plane sailing: Greg using a hand plane to aris the edges of the plywood sheets to conceal any inconsistencies along the edges
-
-
More battens: Greg fixing the ceiling battens to hold the flat plywood ceiling
-
-
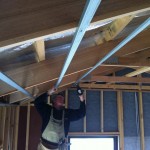
Getting there: half of the ceiling insulation installed and the battens for the plywood ceiling
-

-
Filling up: the ply sheets cover a lot of area – a large part of the ceiling was done quickly
-
-
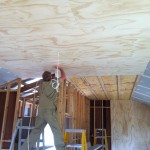
Gun control: Greg using the nail gun to fix the plywood sheets in place
-
-
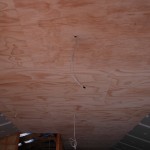
Little ray of light: the reflected sunlight on the ply ceiling
-
-
Done: the ceiling in place, just needing a sand and some paint
-
-
Nearly done: lining the end wall of the bedroom
-
-
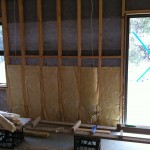
Line ’em up: the wall batts fitted in between the timber studs
-
-
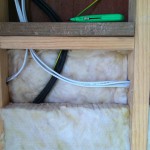
Caution: take care when cutting batts around electrical wires
-
-
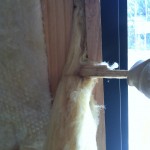
Poker: stuffing the batts in between the stud and window frame
-

-
Jammed tight: batts cut to size
-
-
Made by hand: Greg arised each edge of the ply sheet with a hand plane
-
-
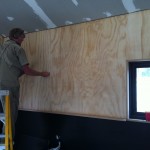
Lining up: the stacked apple crate reference extends inside to the sheets of ply
-

-
All over: batts packed around plumbing pipes and electrical wires
-
-
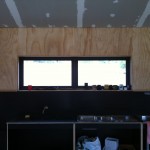
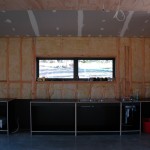
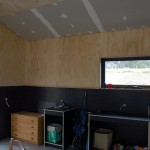
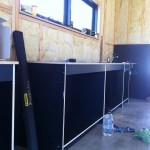
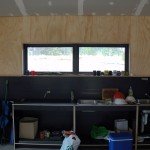
Contrast: the black kitchen and light ply walls
-

-
Fun for the whole family: a blackboard splash back can be useful for lists and creative pursuits
-
-
Ebony and ivory: the two toned wall to the kitchen
-
-
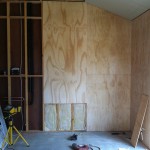
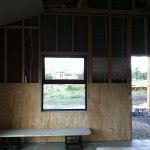
Complete: an entire wall lined
-
-
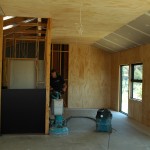
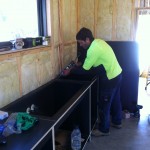
Kitchen installed: the joinery units fixed in place
-
-
Food store corner: the fridge and pantry will go in the corner; the stove in the gap between the units
-
-
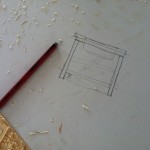
Working drawing: a quick sketch of the kitchen joinery construction
-
-
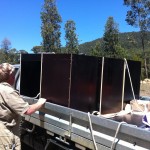
Kitchen delivery: the joinery units being unloaded from the back of Greg’s ute
-
-
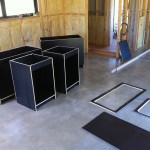
Kit of parts: the kitchen units and the tops, ready for assembly
-

-
On the level: Mark leveling the kitchen units. He said the floor was one of the flattest he had ever seen
-
-
Exposed: the edges of the plywood left untreated
-
-
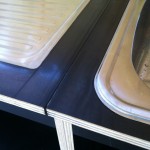
Gunning it: Mark caulking the joins in the bench tops
-
-
Used kitchen: the aftermath of Xmas
-
-
Attention to detail: the black sealant between the joins in the bench tops and around the flush edges of the sink and trough
-
-
Temp job: the waste outlet from the laundry

Pingback: Leverage
Pingback: Multiple streams of income
Pingback: Investing in the stock market